Because they always look as chic as hell.
AD INFO: This post contains affiliate links (denoted by a ‘*’) & gifted items (denoted by ‘gifted’)
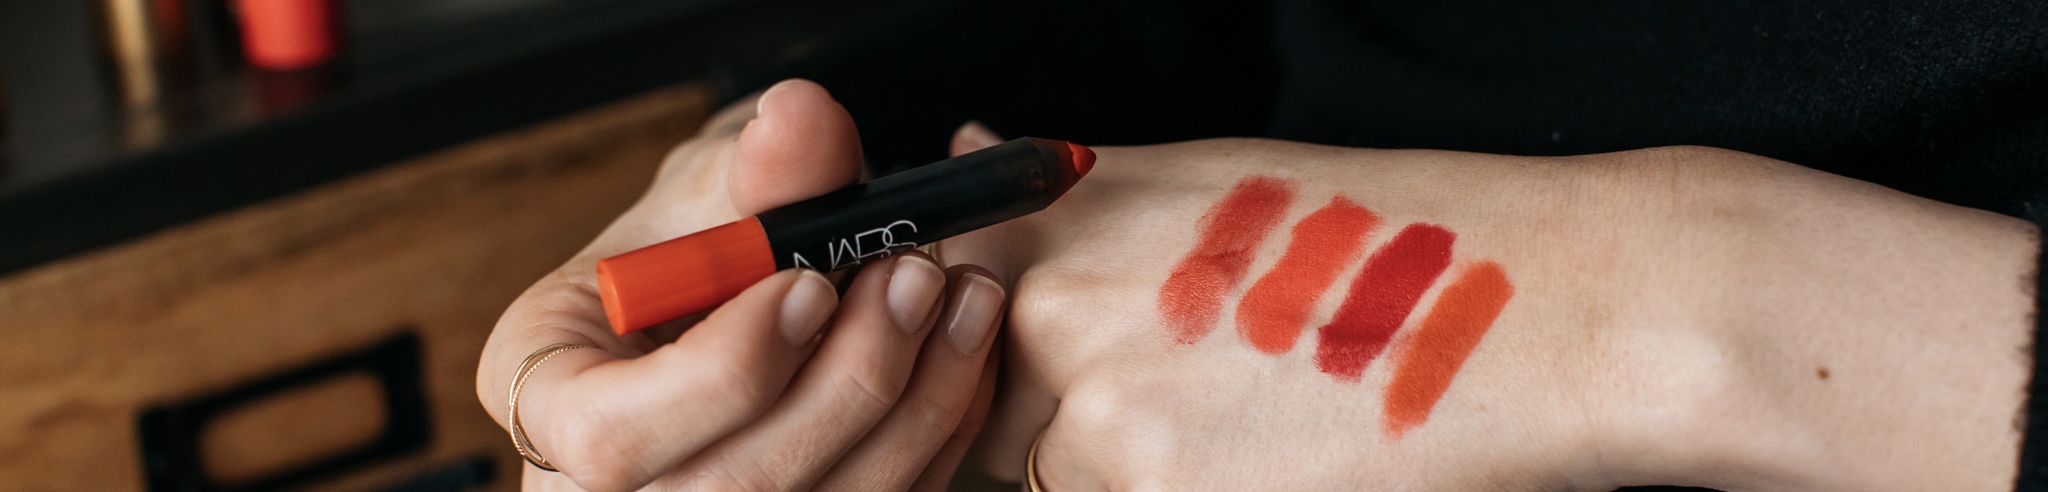
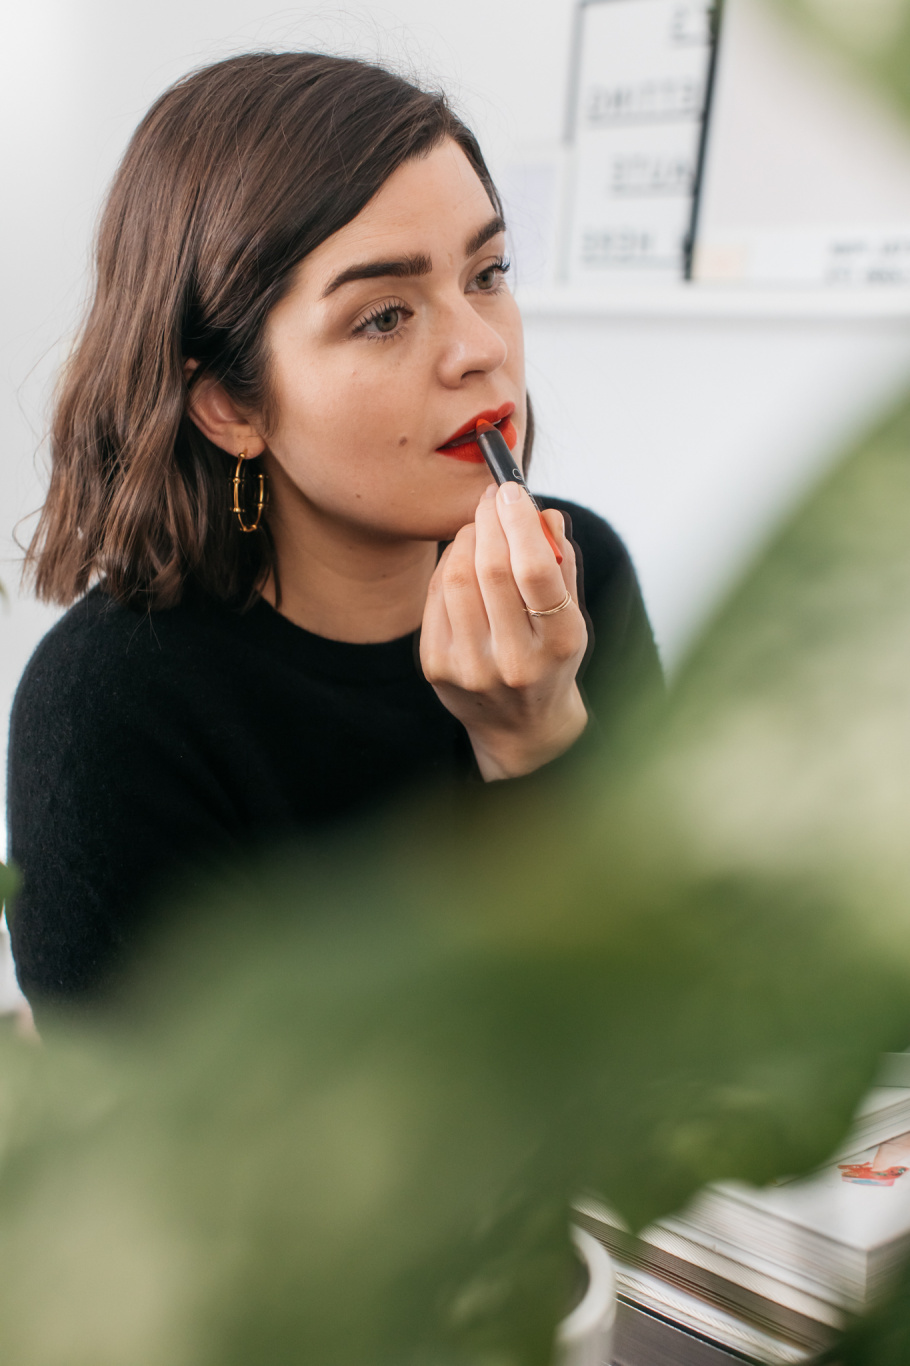
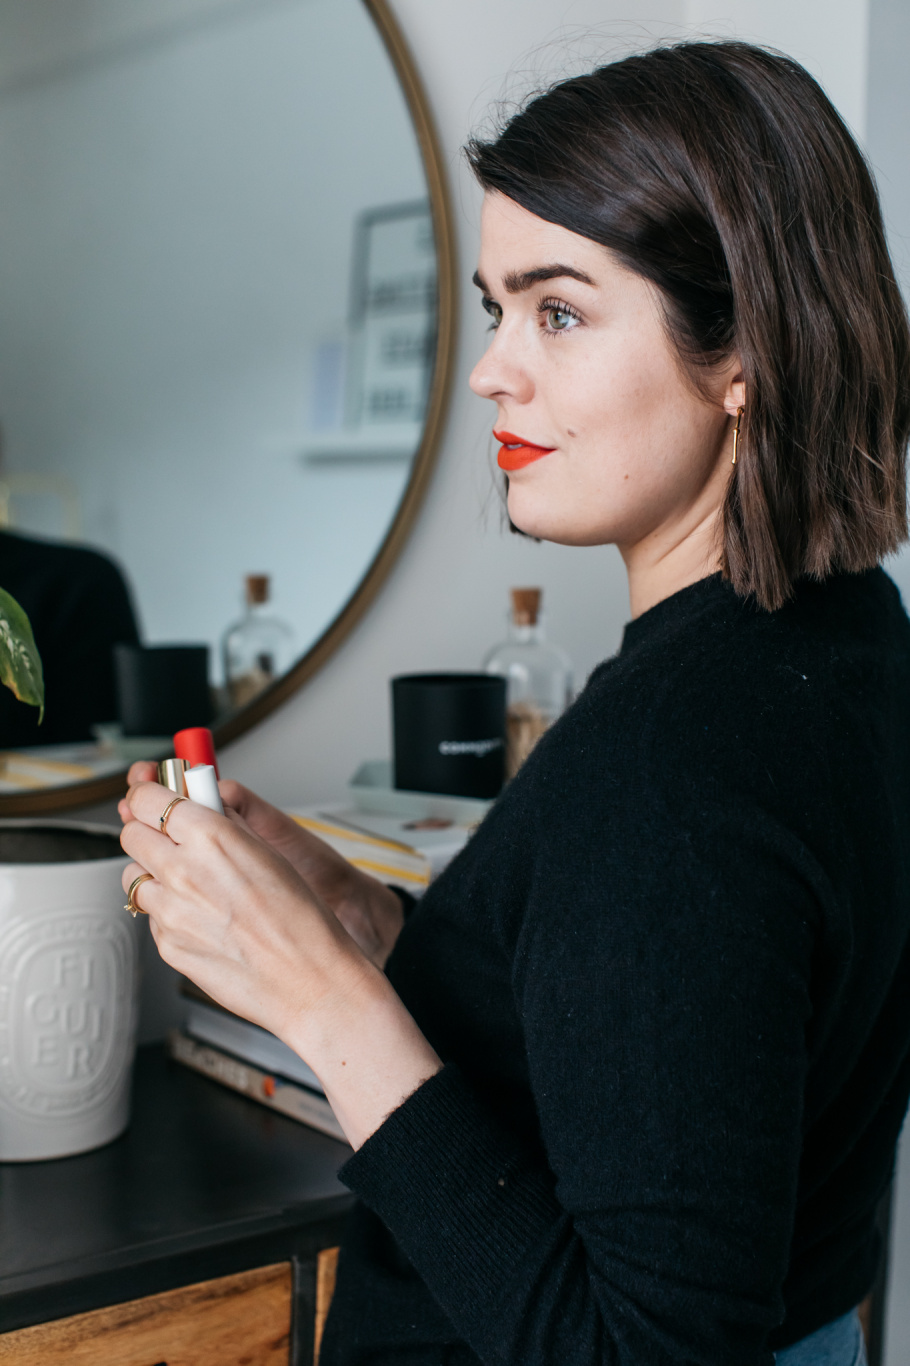
I feel like I wheel out some kind of red lip recommendation blog post at least once every 12 months, so consider this 2019’s official offering. They are just chic as hell aren’t they? And after years of experimenting with them I feel like I’ve finally nestled into my comfort zone. A wickedly bold red, often more orange-toned than not and in a matte finish that leaves my lips just on the right side of sheen-free, without looking like a raisin.
My perfect pairing is to wear them with minimal makeup. A bit of bronzer, a light amount of mascara to leave my lashes looking fluffy and a groomed brow. Purposefully undone, the ‘I just woke up like this‘ makeup with a twist; it’s a fast-track train to polished, without being too glam. My favourite event makeup that I’ve done for a book signing recently included a red (video of that here), and I’d say that at least once a week I pull one out. Want to know my favourites and my tips for making them last as long as physically possible without having to use a formula that rids your lips of all and any traces of moisture? Read on…
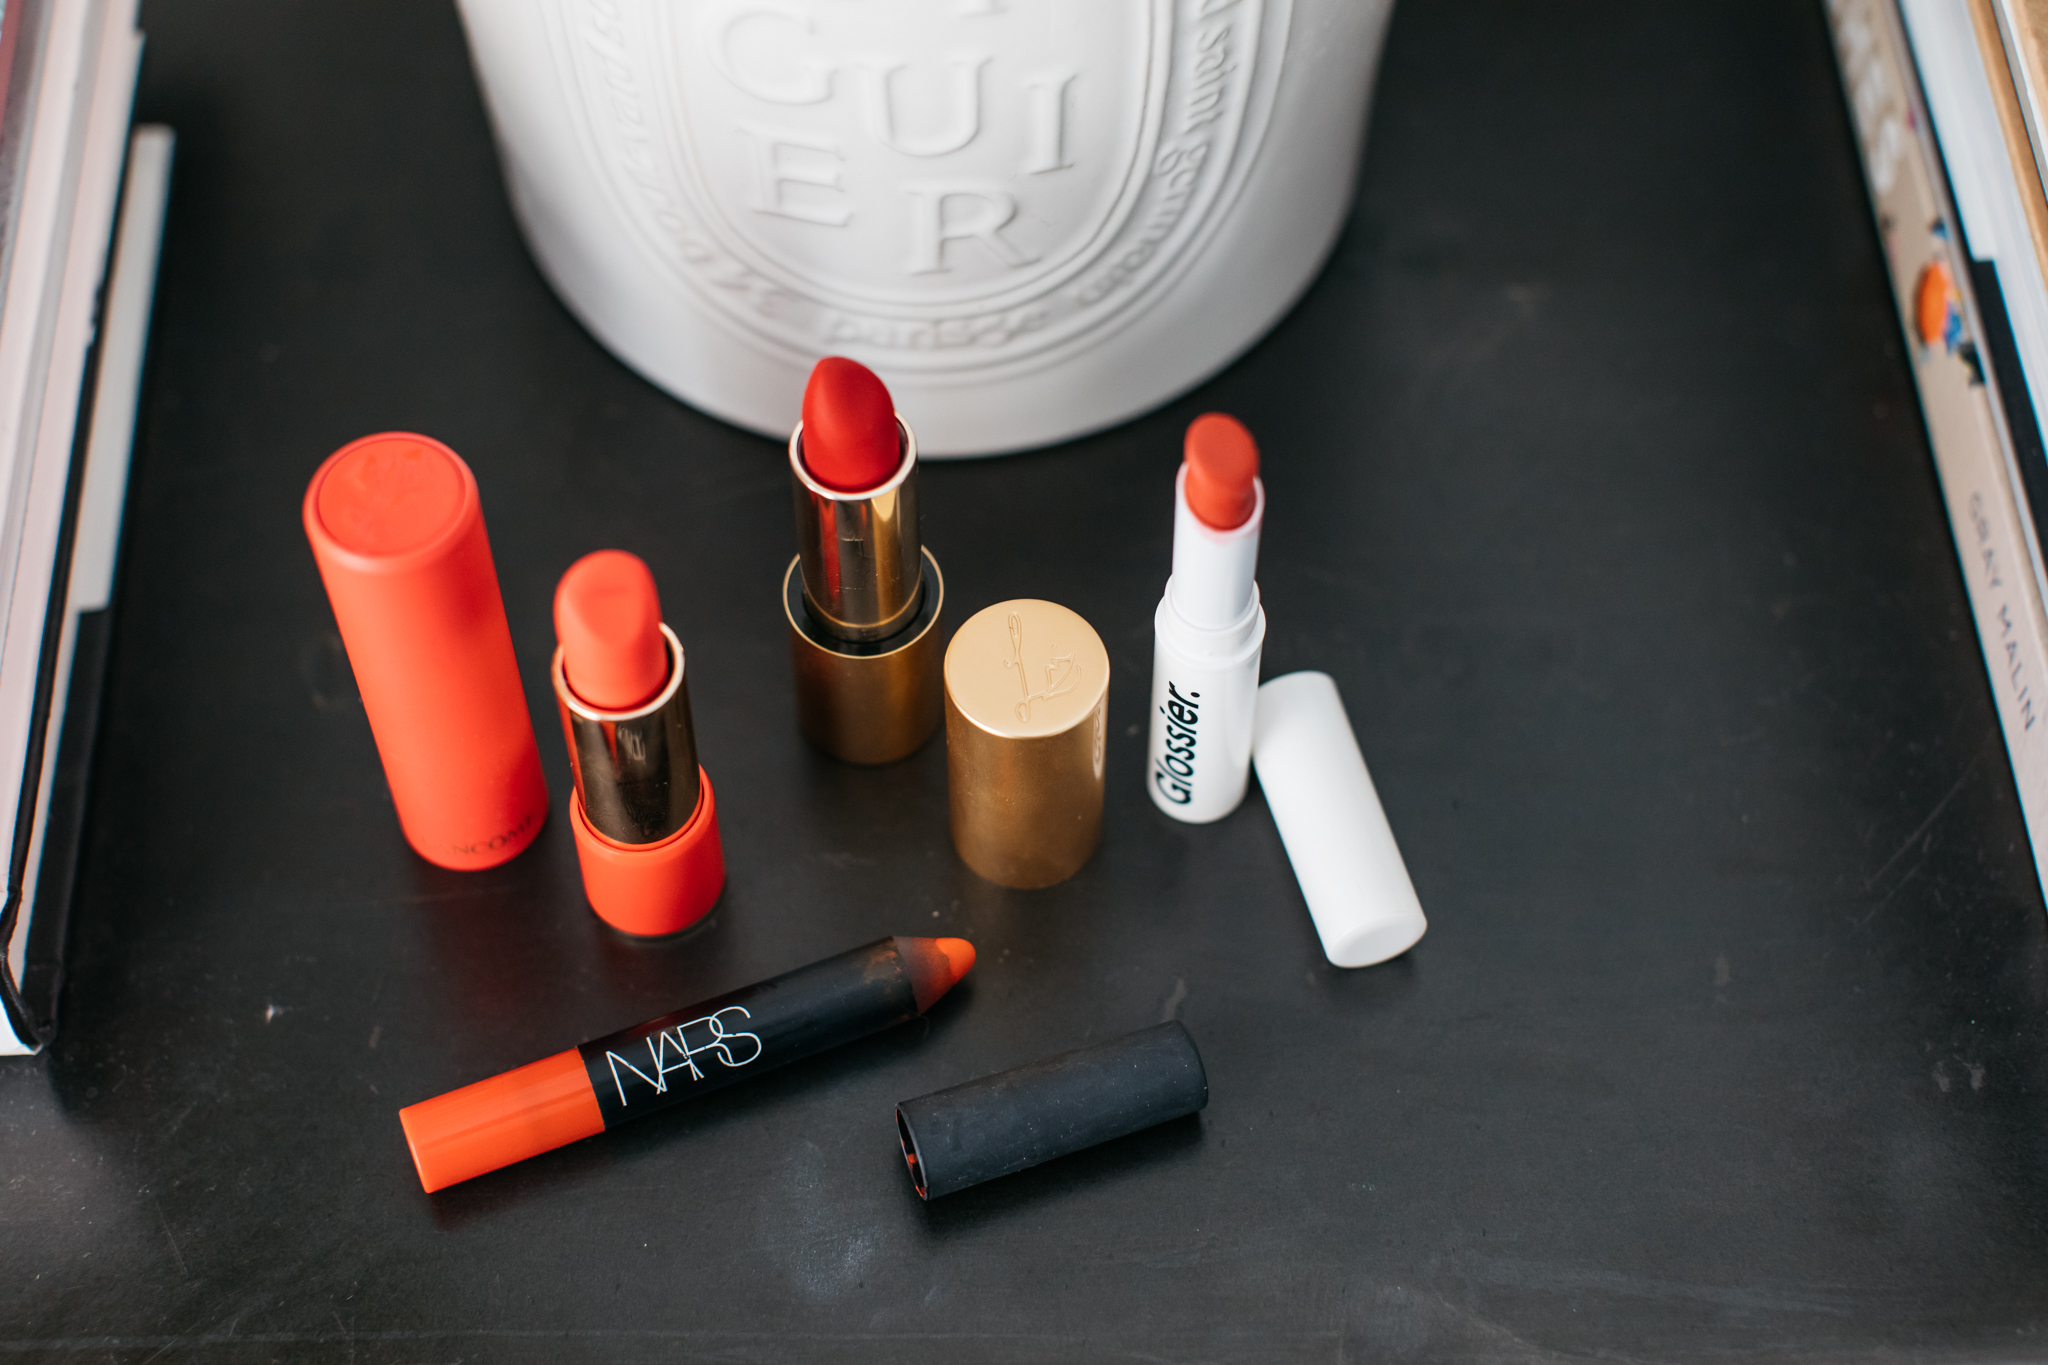
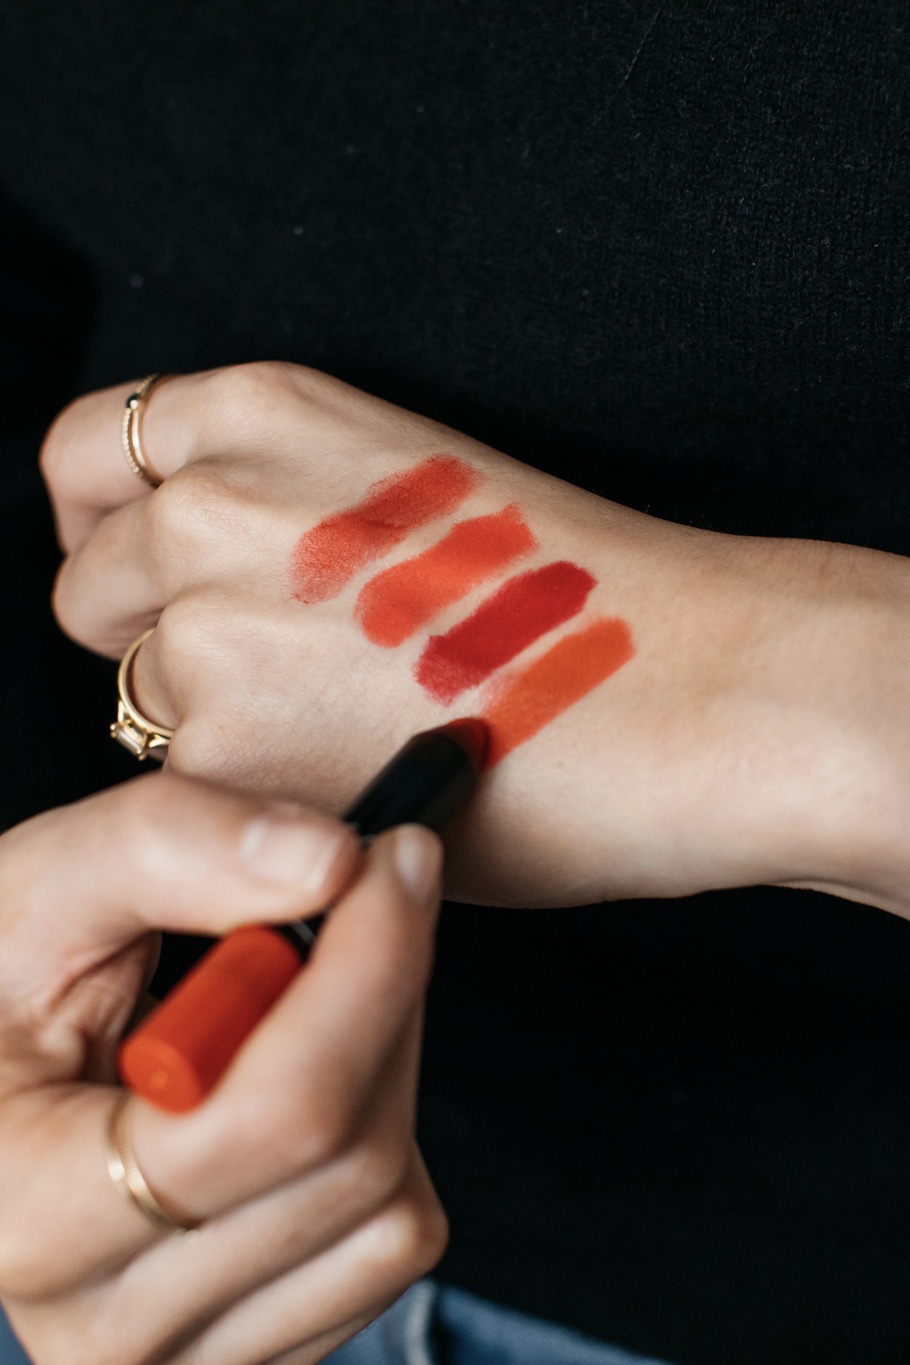
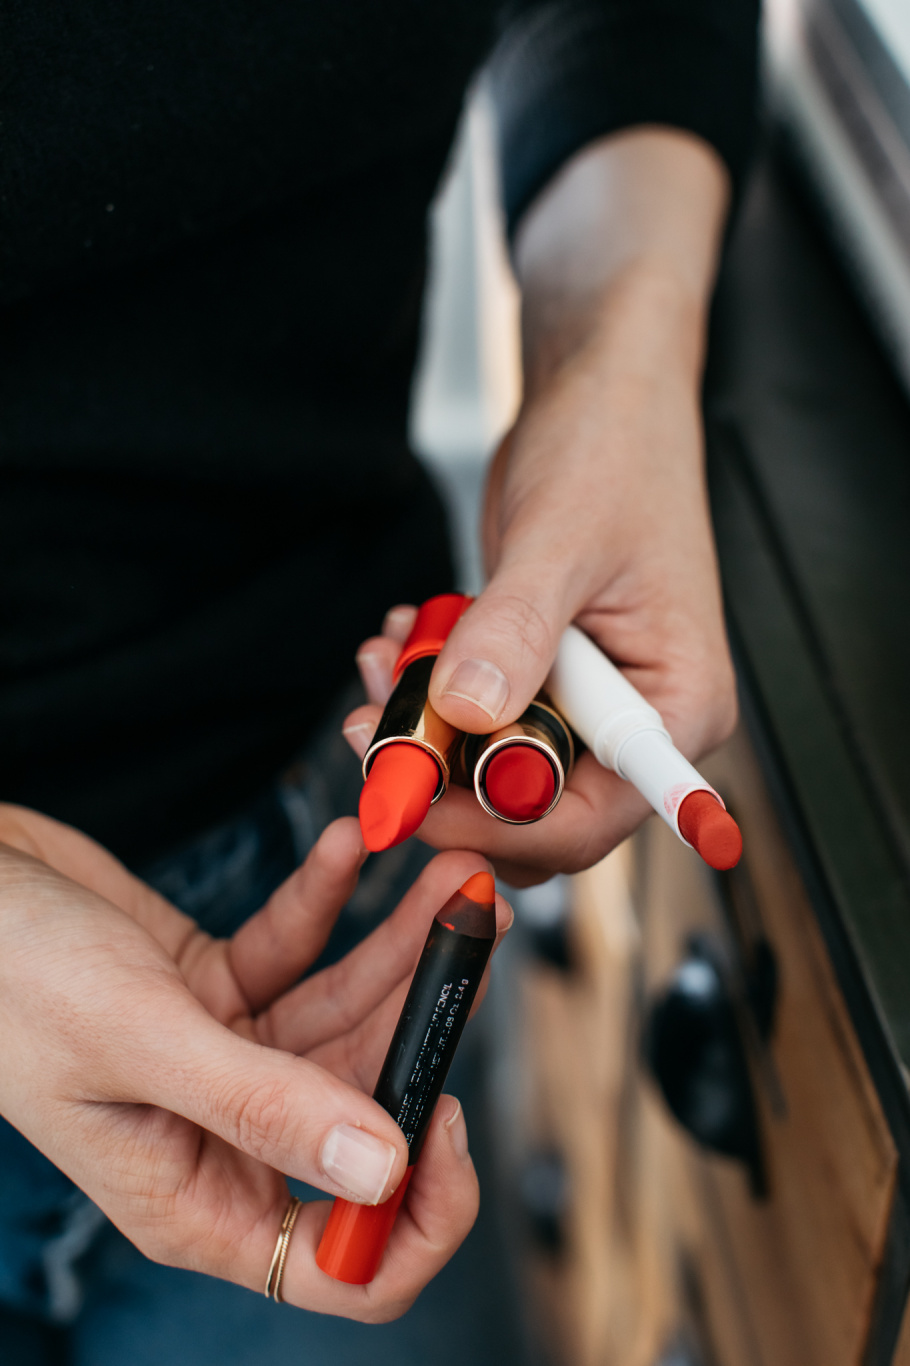
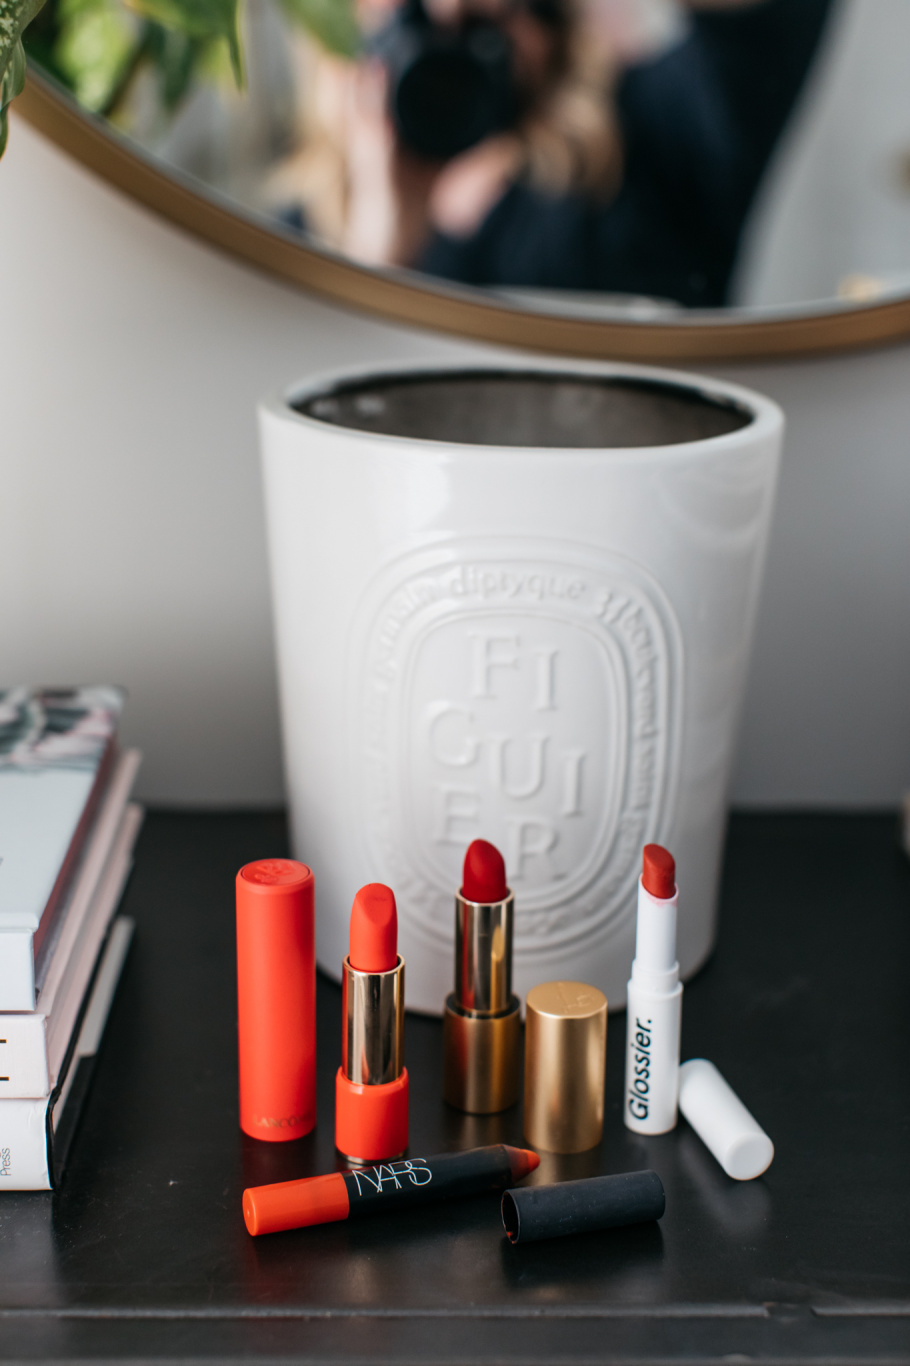
NARS Velvet Matte Lip Pencil in Red Square*. These lip pencils have been my favourites for years; not for the nudes, but for the plethora of reds that they offer. I love that they are a pencil format as you can completely forget the brush-step that I mention below, or needing to use a lip liner – they are just too darn easy to apply and reapply throughout the day. This colour is the stubbiest one I own which is a good sign and is a classic orange-red. The formula might be a little thick for some, but it paints on well without dragging the lip and lasts forever.
Lisa Eldridge Lipstick in Velvet Ribbon (gifted). LISA PLEASE BRING THESE LIPSTICKS BACK! I was lucky enough to be sent one of the trio of lipsticks that Lisa released before Christmas, but if and when she restocks I’m completing my collection because the formula is just something else. Like actual velvet on the lips, the texture is smooth and silky but dead matte, which is just something that I’ve never experienced before. A classic red, this is more traditional that my other favourites, but it’s a nice one to turn to when I just want a straight-up traditional rouge.
Glossier Generation G Lipstick in Zip*. The anomaly of the pack as it’s a sheerer formula than anything else that I’ve mentioned here, but that makes it a great fuss-free everyday version of a red, or a good starter lipstick for the red lip-averse of us out there. It’s a glorified pigmented lip balm, but the more you layer the more colour you get out of it and you can get some serious pigment here (look at the left shade of all the swatches about – that’s it!).
Lancome L’Absolu Rouge Drama Matte in 157 Obsessive Red* (gifted from Allana!). Despite the name, this shade is actually more like a luminous coral, but the slight tinge of pink that runs though it does make it an easy one for most of us to pull off. The packaging is luxe, the formula is creamy, yet clings to the lips and the parma violet scent gives an old school feel to the whole thing. This one is a new addition to me – thanks to Allana – but one that I’ve seriously enjoyed wearing. Want to see it applied? Check out the GRWM video that we filmed together and watch me fall in love with the colour.
HOW TO MAKE YOUR BOLD LIP CHOICES LAST LONGER
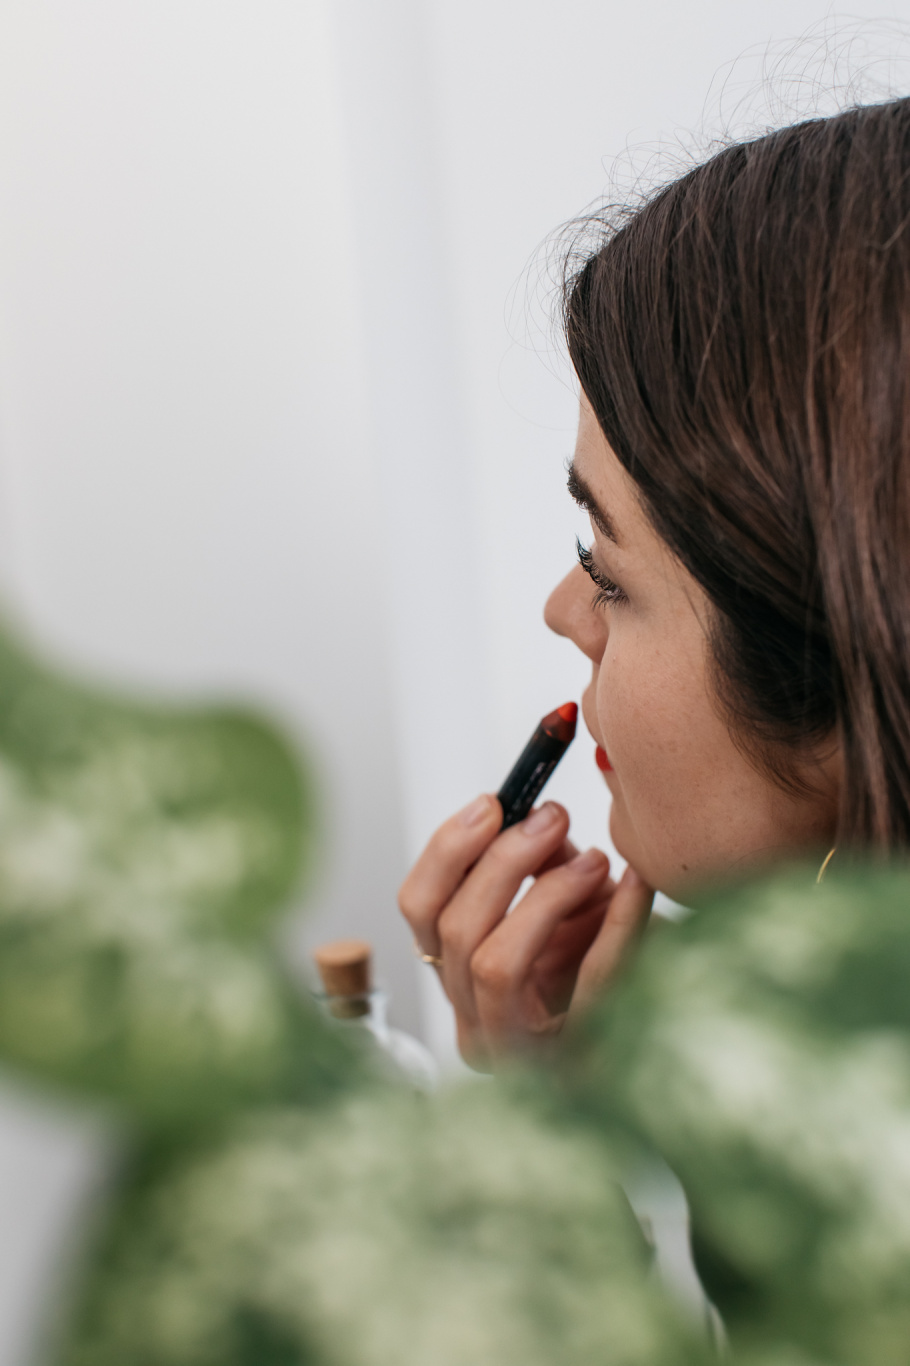
Layer it up. I’m not one for liquid lipsticks these days, but the application of them does yield good results in the longevity department, so borrow the technique without the need to borrow the formula too. So that means layering your lipstick. Apply a layer, blot off the excess, apply another layer, blot off the excess and repeat this as many times as you feel is required. I usually find that three-ish layers is optimal.
Go for the blur. I actually quite like the look of a lived-in bold lip that doesn’t look too perfect, so a slightly blurred lip line not only is my preference but gives you a bit of wiggle room in terms of how it looks as the hours pass. Apply your lipstick using the technique outlined above and then take a dry cotton bud and use it to slightly blur out the edges of your lip. This extra blending step really helps to push the pigment in, but also makes the lived-in look appear intentional in the first place.
Use a brush. Personally I find using a brush always helps my lipstick to last longer. Plus, it means that it doesn’t look like a toddler has applied it. Take the smallest brush you can be arsed to use and start with the lipstick in the centre of the lips, working your way to the outer corners. Then do the whole blot, apply, repeat thing. I actually use a ZOEVA Detail Shader* (gifted), which is so darn small, but really helps me to get right into those hard to reach corners.
Always bring a tissue. Tissues are a bold lip’s best friend. You can blot and reapply throughout the day which helps to get rid of any areas where the formula might have bunched up a little and gives you a surface to smoothly reapply. You can pat away any grease, food, ice-cream – whatever you’ve eaten. You can wipe it away completely and start again. Pack a tissue and a lip balm, the latter of which can be used to remove it and nourish your lips after you’ve rubbed the colour off if you change your mind, or just need a 10 minute lip moisture revival midday. Pack ’em both and they’ll have you covered 24/7.
Photos by Emma Croman
‘An Edited Life’ is now available to purchase worldwide HERE
SHOP THE POST*


Comments